Make a BALE
v. The process of emptying the full BALER, disposing of the BALE itself, and making the device ready for the next BALE.NOTE: There are several variations on how to do this. Over the years, I've tried a few, and as a result, I've outlined below the method I think really works best.
It's really only a few simple steps, but with lots of added description in an attempt to make it as clear as possible. So, don't worry. It's much, much easer to do than it is to describe. And—because this way avoids many potential hassles—it's also the fastest way I know of, overall. You save a lot of time and trouble for the next person—which just might also be you.
So. Both better and faster. What's not to like?
HOW TO: Make a BALE
- READY?—Collect “Lid” CARDBOARD In Advance
- During your SHIFT, make sure to save up large, flat pieces of sturdy CARDBOARD—e.g., from SHIPPER cartons, Paper Towel CASES, etc.—and store them behind the BALER.
- During your SHIFT, make sure to save up large, flat pieces of sturdy CARDBOARD—e.g., from SHIPPER cartons, Paper Towel CASES, etc.—and store them behind the BALER.
- GET SET...—Verify, Clear Out Trouble, and Make a Lid
- VERIFY: Is it really time for a Bale?
- Is BALER halted, with grate down and red “Bale Made” indicator on control panel lit?
- YES?
- Definitely full, and time for a BALE!
- NO?
- CHECK and see if BALER is really full:
- CLOSE the BALER'S wire safety grate and PUSH the AUTO button to cycle the BALER as usual.
- WATCH the I-beam atop the compression platen. When it pauses at the lowest point of its travel cycle, compare its top edge to the top edge of the BALER'S side door. It should be not much, if any, higher than the top edge of the BALER'S solid side door.
So, where is it? Is the I-Beam... - BELOW door top by more than a few inches?
- Not enough for a standard BALE. Only continue if manager confirms go ahead. Otherwise, come back later.
- AT or NEAR door's top edge?
- Perfect! Time to make a BALE.
- ABOVE door top by more than a few inches?
- May be too full to easily make a BALE; consider taking out the excess to set aside. You can put it back in later, after you've finished making this BALE, when the chamber is once again empty.
- VERIFY: Got CARDBOARD for lids?
- NO?
- Uh-oh! Someone squished your stash behind the BALER! You need to find more in a hurry.
- Signal others to add no more CARDBOARD until BALE is made.
- Close safety grate, push AUTO to cycle BALER as usual, but at lowest point press the red EMER(gency) STOP button.
- Quickly scrounge around for suitable large flat CARDBOARD, starting with the Bakery's CARDBOARD dumpster. If all else fails, gather and break down six BANANA BOXES , e.g., from the Produce DEPARTMENT.
- Got BOARD? If necessary, pull out red EMER(gency) STOP button you may have previously depressed, and press and hold the MAN(ual) UP button until the safety grate rises.
- YES? Continue.
- Clear Out Trouble: No excess, No stuck fragments, No tape
- If there's a drastically irregular, sloped or otherwise uneven surface, or if there's simply too much jammed inside, it's easiest to just take out whatever you deem to be a potential problem, set it aside, and put it back in later, after the BALER is empty.
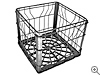
- Now, get a MILK CRATE to stand on (one should usually be nearby), and clean out any CARDBOARD fragments stuck up in the cracks around the underside of the BALER'S platen.
- Also make sure no tape is stuck up in any of the 6 wire-guide channels set into its underside.
- Put A Lid On It
- Make a top “lid” for the BALE by putting layers of the large flat CARDBOARD you've collected just for this purpose on top of the already compressed CARDBOARD inside the BALER. Hold aside enough flat stock to likewise make a bottom lid of one or two layers in a later step. The lids will help keep the channels open so you can more easily thread in the BALE WIRES later.
- GO!—MAKE THE BALE
- Squish It Again
- Close the safety grate and cycle the BALER. When it reaches its bottom limit (listen for a change to a higher audible pitch), press and hold the MAN(ual) DOWN button to compress the BALE as tightly as possible.
- Open Wide
- Release the button and unlock the BALER'S side door by operating the wheel screw on the control side of the BALER. Then use the door handle to swing out the side door until it's wide open—past 90°—and expose the edge-on side of the BALE. The grate should also pop open by itself and lift out of the way as soon as you tug on the side door. If not, get help.
- Clear Away Junk
- Put an upside down MILK CRATE in front of the open BALER, get up, and inspect the top of the platen in its "down" position. Remove any CARDBOARD fragments. Pay special attention to any stuck down in the groove along the back edge, otherwise in the next step they might block your RAMROD.
- Locate the large iron RAMROD pipe kept behind the BALER, and plunge it into the wire channels on the underside of the platen on top of the BALE until you make contact with the metal frame at the back of each channel. If necessary, use the RAMROD to break through any obstructing CARDBOARD, jack-hammer style. (If the lid you set in place earlier is thick and strong, it minimizes difficulties here.) If you're still unable to clear a particular channel, try the next one over. Your aim is to clear at least five of the six available channels.
- Get Bale Wire
- After the channels are cleared, go to the elevated BALE WIRE tray along the back wall and select 5 strands. Pull them out carefully, in a gentle arc, to avoid kinks and bends.
- Thread Wire Channels
- Starting with a channel on either outer edge, thread the individual strands one at a time, loop-end first into each of the channels, gently pushing the wires in until the loop protrudes about six inches out of the channel opening at the bottom of the BALE.
If the wire becomes stuck, try to back it out for another try. If you can't, take the RAMROD you used earlier, wrap the tail of the stuck wire several times around it to create a handle, and carefully pull the wire out and discard it.
Try again with a fresh piece of wire, this time feeding the straight end of the wire in first. If that doesn't work, remove it as before, and try the next channel. The goal is to feed at least 5 wires completely around the bulk of the bale. In a pinch, 4 may have to do, but is definitely not advised. In such a 4-wire case, consider the extreme measure of threading a second, reinforcing wire through an outside channel that has no threaded neighbor within a distance of two empty channels. - Twist 'Em Tight
- One at a time, for each wire, thread the straight end of the wire into the hole of the looped end and take up most of the slack, so that while you pull on the wire the loop stands only a few inches off of the BALE surface, ideally only about a quarter to a third of the way up the face of the BALE from where the loop exited the channel. By leaving enough slack to pass your hand freely around the wire, you should avoid any paper cuts from the edge of the BALE as you twist the wire in a later step.
Later, as pressure is taken off the compressed BALE, any slack you leave now will disappear anyway, so it's nothing to worry about. - Right at the loop, put a hairpin bend in the straight wire so that it reverses direction at the point where it exits the loop. Then, reach behind the two lengths of wire with your other hand, and pull the middle part of the free-ended wire around to the front. As you do this, the loose end of the wire should catch the other wire segment at the edge of the BALE all by itself, and hold its position. The goal is to create a vaguely D-shaped handle out of the loose portion of the wire.
- Twist this D-shaped part of the wire around and around the tight portion of wire several times, until it has become too small to easily turn.
- Take the loose, pointy excess end of the wire and turn it around and under the wrapped wire so it won't poke you or anyone else as you work your way across the open face of the BALE.
Again, other methods of tying BALE WIRE exist, but they are also more likely to cause the wire to slip or break. - Place a Pallet
- When all wires are in place, get a solidly built PALLET (plastic or CHEP, not flimsy plain wood), and center it with its long edge about 5 or 6 inches from the foot of the exposed BALE.
- All Clear? Stand Back...
WARNING: You're about to put the BALE WIRES under great strain. If one or more wires break, it can be extremely dangerous. No one can dodge a supersonic wire whip. Not to mention, the BALE literally weighs a ton! So,...- Get everyone and everything out of harm's way. Clear out the space at least 20 feet forward of the open side of the BALER. Ensure it stays clear until after the BALE has been safely ejected. ...Including you too!
- Stand off to the side of the BALER, and operate its controls from just around the corner.
- Eject!
- When all is clear, press and hold the MAN(ual) UP button to raise the BALER platen and then engage the kick plate that will tip out the BALE.
- The compressed CARDBOARD stack will expand and take up any slack left in the wires.
- If you wrapped them properly as instructed, and used the correct number, they shouldn't slip, and are unlikely to break.
- Continue to push the MAN(ual) UP button until the BALER'S bottom kicker plate has engaged, tipped the BALE forward, and caused it to topple out onto the PALLET you previously set in place.
- Trouble? NEVER let any part of your person get between the tipping BALE and the PALLET its falling towards, no matter if its slow or completely stuck. Don't get hurt—get help!
- Tote That Bale
- Get a JACK or POWER JACK and move the BALE and PALLET combination aside.
- If the GATE to the TRUCK is locked, DROP the PALLET so the BALE sits short-end-forward right in front of the GATE, but not so close that it obstructs the raising of the GATE'S protruding bottom lip.
- On the other hand, if the GATE is open, put the PALLET and BALE on the TRUCK, tight against the outer wall, making sure it's on the side opposite any previous BALE, if present, so the weights of multiple BALES counter-balance each other.
- Remember to add one to both the PALLET and BALE tallies in the appropriate columns of the SHEET kept at the RECEIVING desk.
- MAKE READY
- Clean Out Scraps, Tape, etc.
- When you return to the BALER, pay special attention to the BALE WIRE channels at the back and along the bottom of the BALER cavity. They must be completely cleaned out.
- To begin, find a ready-to-recycle, sturdy BOX flap, cut it off, and you have a “broom.” If necessary, use it to sweep any loose CARDBOARD scraps or other debris resting on the bottom of the BALER chamber itself.
- Next, fold this same severed BOX flap in half to create a long, narrow U-shaped channel scraper. The rounded fold at the end does the work, as it more or less matches the interior shape of the channel.
- Starting at the top rear of the chamber, slide your disposable scrapper deep into the first channel. Drag it down, then out along the shallow bottom, so any debris exits the open side of the cavity.
- Repeat this scrape-out for each and every channel.
- Because it's surprisingly easy to block the next piece of BALE WIRE to be threaded through, it's important to ensure not even the smallest CARDBOARD scrap, tape, sticker or anything else remains in any channel.
- Reset the Kick Plate
- Swing the BALER door closed, but don't tighten the hinge locking screw. Instead, save time by simply pushing the bottom of the door closed with your foot. Meanwhile, reach for and lower the wire mesh safety grate. If the safety grate won't latch, push harder with your foot to close any gap between the door and BALER frame.
WARNING: You're about to make an extremely loud noise that could otherwise damage your hearing. So, with one hand COVER YOUR EAR on the side of your head towards the BALER cavity. SPEAK UP, and say, e.g., “LOUD NOISE” to warn anyone else in the area (e.g., the RECEIVER, VENDORS, etc.).- Then, push and hold the MAN(ual) DOWN button until the previously raised kicker plate inside the BALER falls back down—CLANG!—to lie once again flat on the bottom of the BALER cavity.
- Remove your foot, swing the door back open and allow the grate to rise.
- Lay Down a Bottom
- The goal here is to ensure no channels become blocked as CARDBOARD is added to create the next BALE. So, make a "Bottom" by laying one or two layers of flat CARDBOARD from your supply over the entire bottom of the BALER cavity. It won't need to be as thick as the top lid. Two layers is better, but even one will do in a pinch. (If you're desperately short on BOARD, you can even omit covering the kicker plate, as no wire passes under it.)
- Again swing the BALER door closed, but this time do tighten the hinge locking screw, so the open edge of the door is secured as tightly as possible.
- Clean Up
- TOSS IN CARDBOARD fragments or empty CASES, etc. that didn't fit into the BALER earlier, or which folks may have brought over while you were making the BALE.
- SWEEP UP any debris.
- WASH UP at THE SINK, since BALE WIRE is grimy stuff your hands are probably very dirty, and then,
- You're done!


 = Hover to color, click to enlarge.